The Estimates section in Billing Now allows you to create and send professional quotations to clients, which can later be approved and converted into invoices.
Use this module to track, manage, and revise offers before final billing.

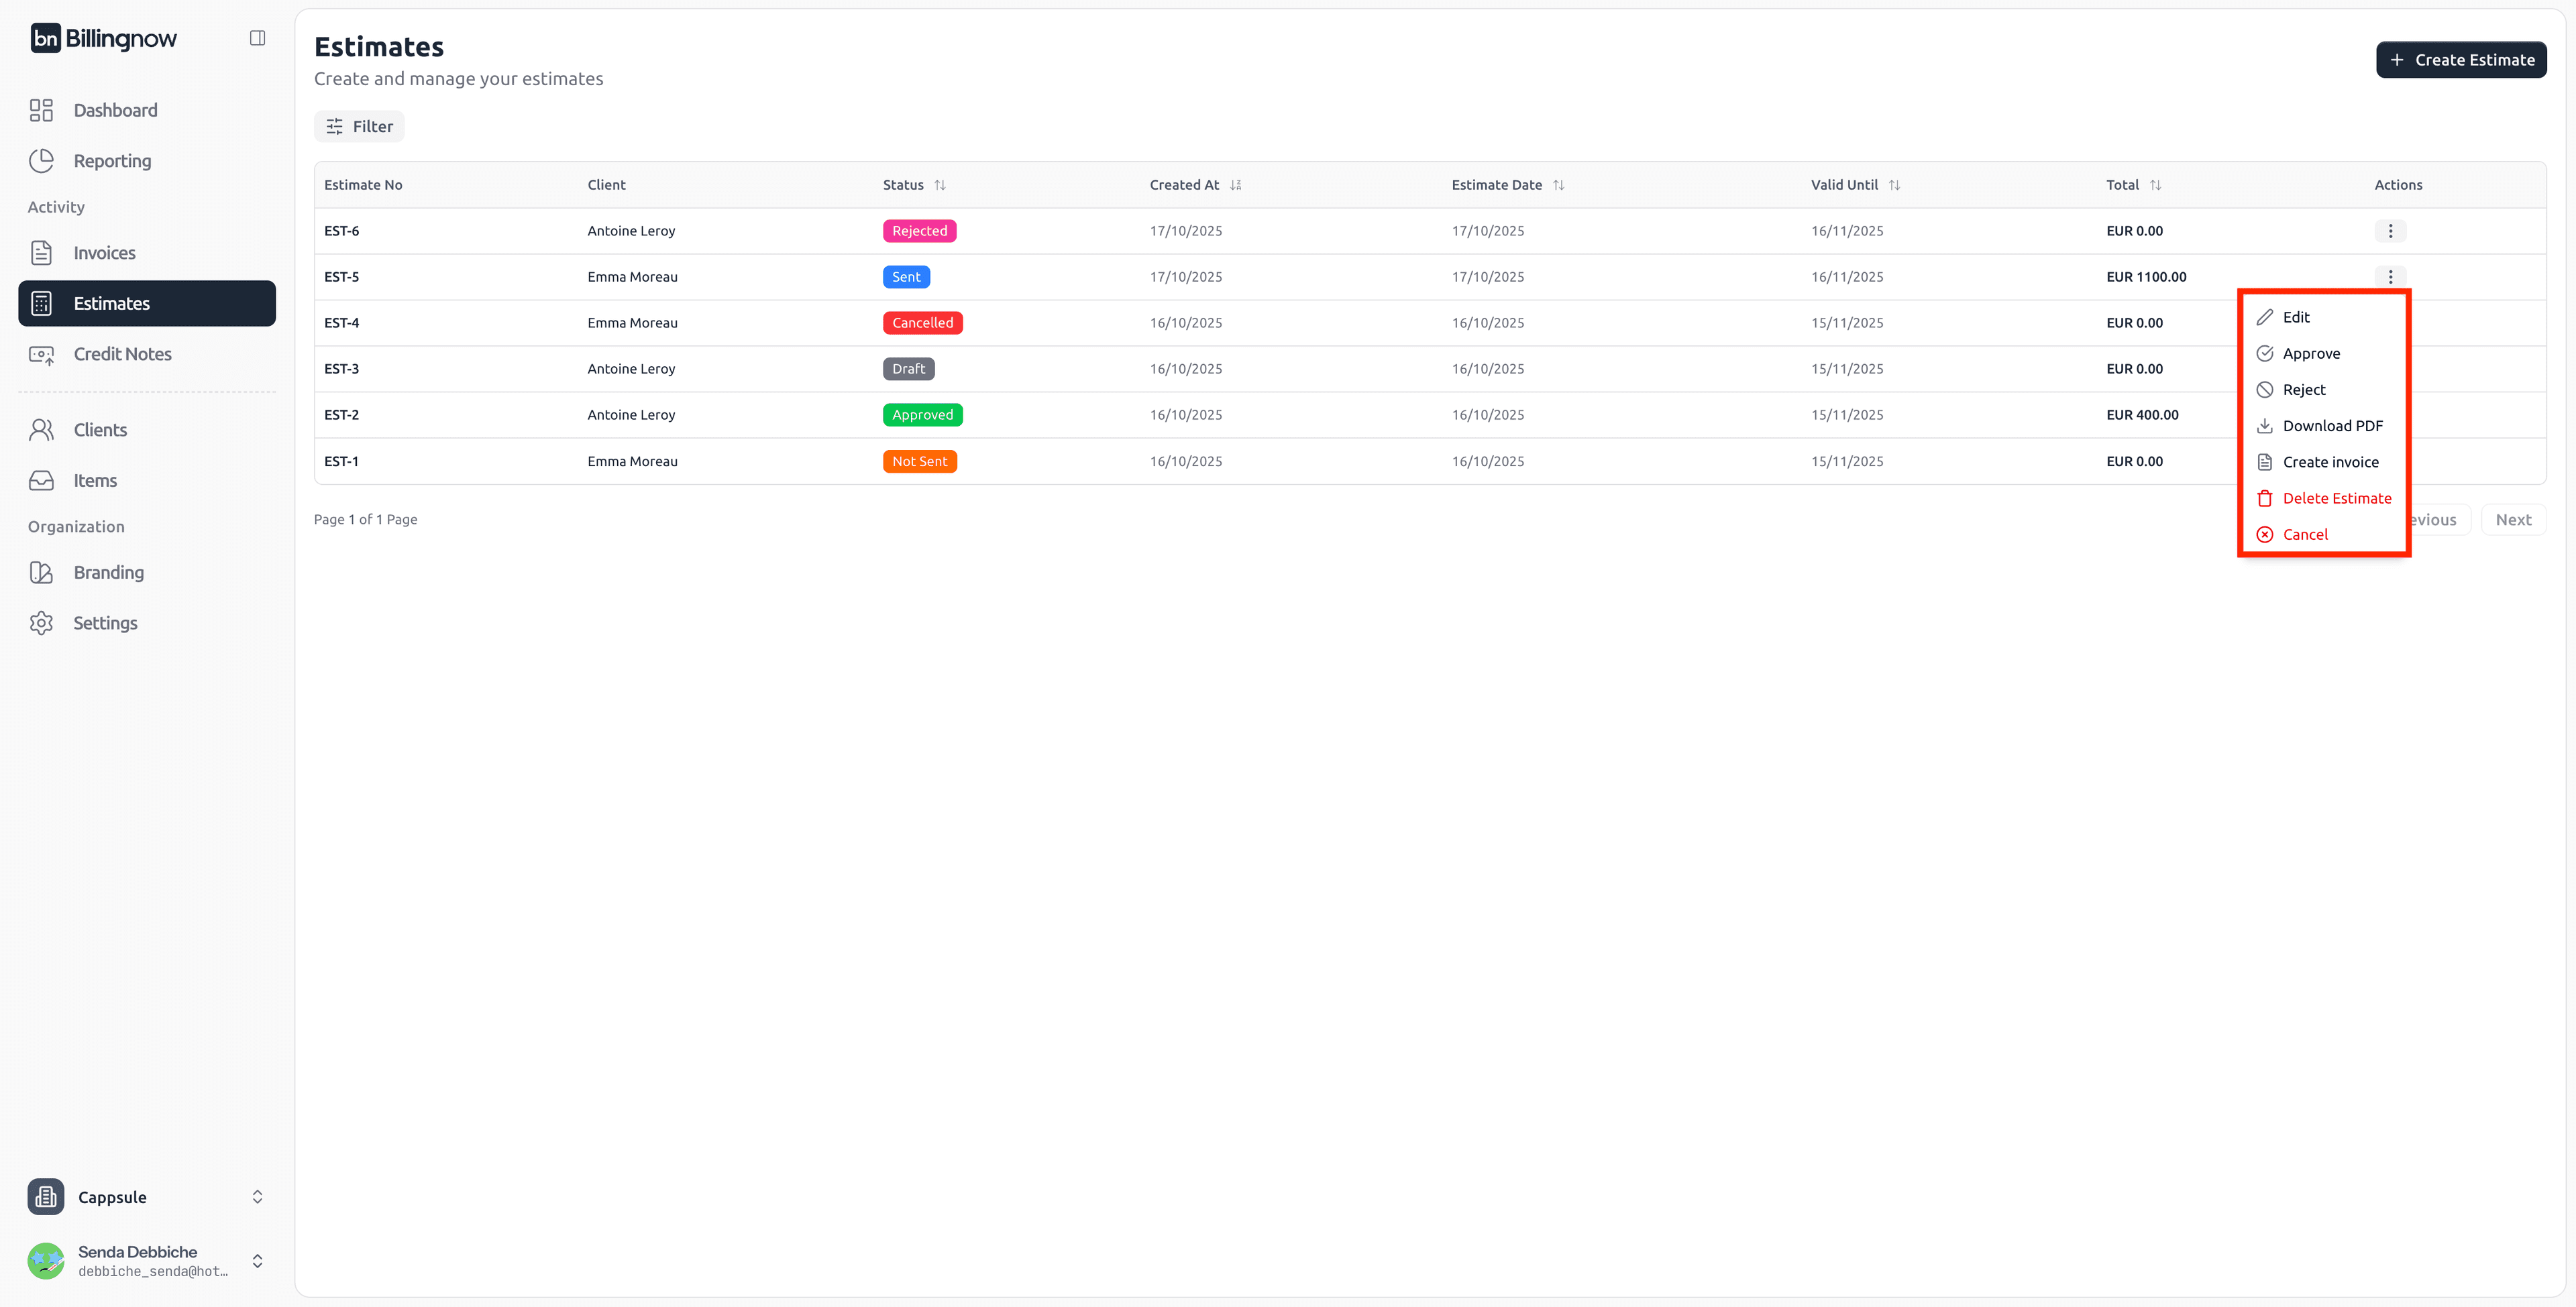
📂 Estimate Management Dashboard
Go to Sidebar → Estimates
The estimate dashboard displays all your current and past quotes, including key details for tracking.
| Column | Description |
|---|---|
| Estimate No | Unique identifier (e.g. EST-001). |
| Client | Customer name linked to the estimate. |
| Estimate Date / Valid Until | Creation and expiration dates. |
| Total | Quoted amount (before tax). |
| Status | Current progress (Draft, Sent, Accepted, Rejected, Expired). |
| Created At | Date of record creation. |
| Actions | Edit, duplicate, convert, or delete. |
⚪ Draft – Not yet finalized.
🟠 Not Sent – Finalized but not yet sent to client.
🔵 Sent – Delivered to the client for approval.
🟢 Approved – Approved by the client, ready for conversion.
🟣 Rejected – Declined by the client.
🔴 Canceled – Canceled by the user.
➕ Creating a New Estimate
To create a new estimate, click the “Create Estimate” button in the top-right corner.
🧾 Step 1: Select or Add Client
Choose an existing client from the dropdown. Or type a new client name to create one on the fly.

🗓️ Step 2: Fill Estimate Details
Add the essential details of your estimate.
| Field | Description |
|---|---|
| Estimate Number | Automatically generated or manually editable. |
| Estimate Date | Date when the estimate is issued. |
| Valid Until | Expiration date for client approval. |
| Currency | Select the estimate currency (USD, EUR, TND, etc.). |
Set a clear validity date to encourage faster client responses and avoid outdated offers.
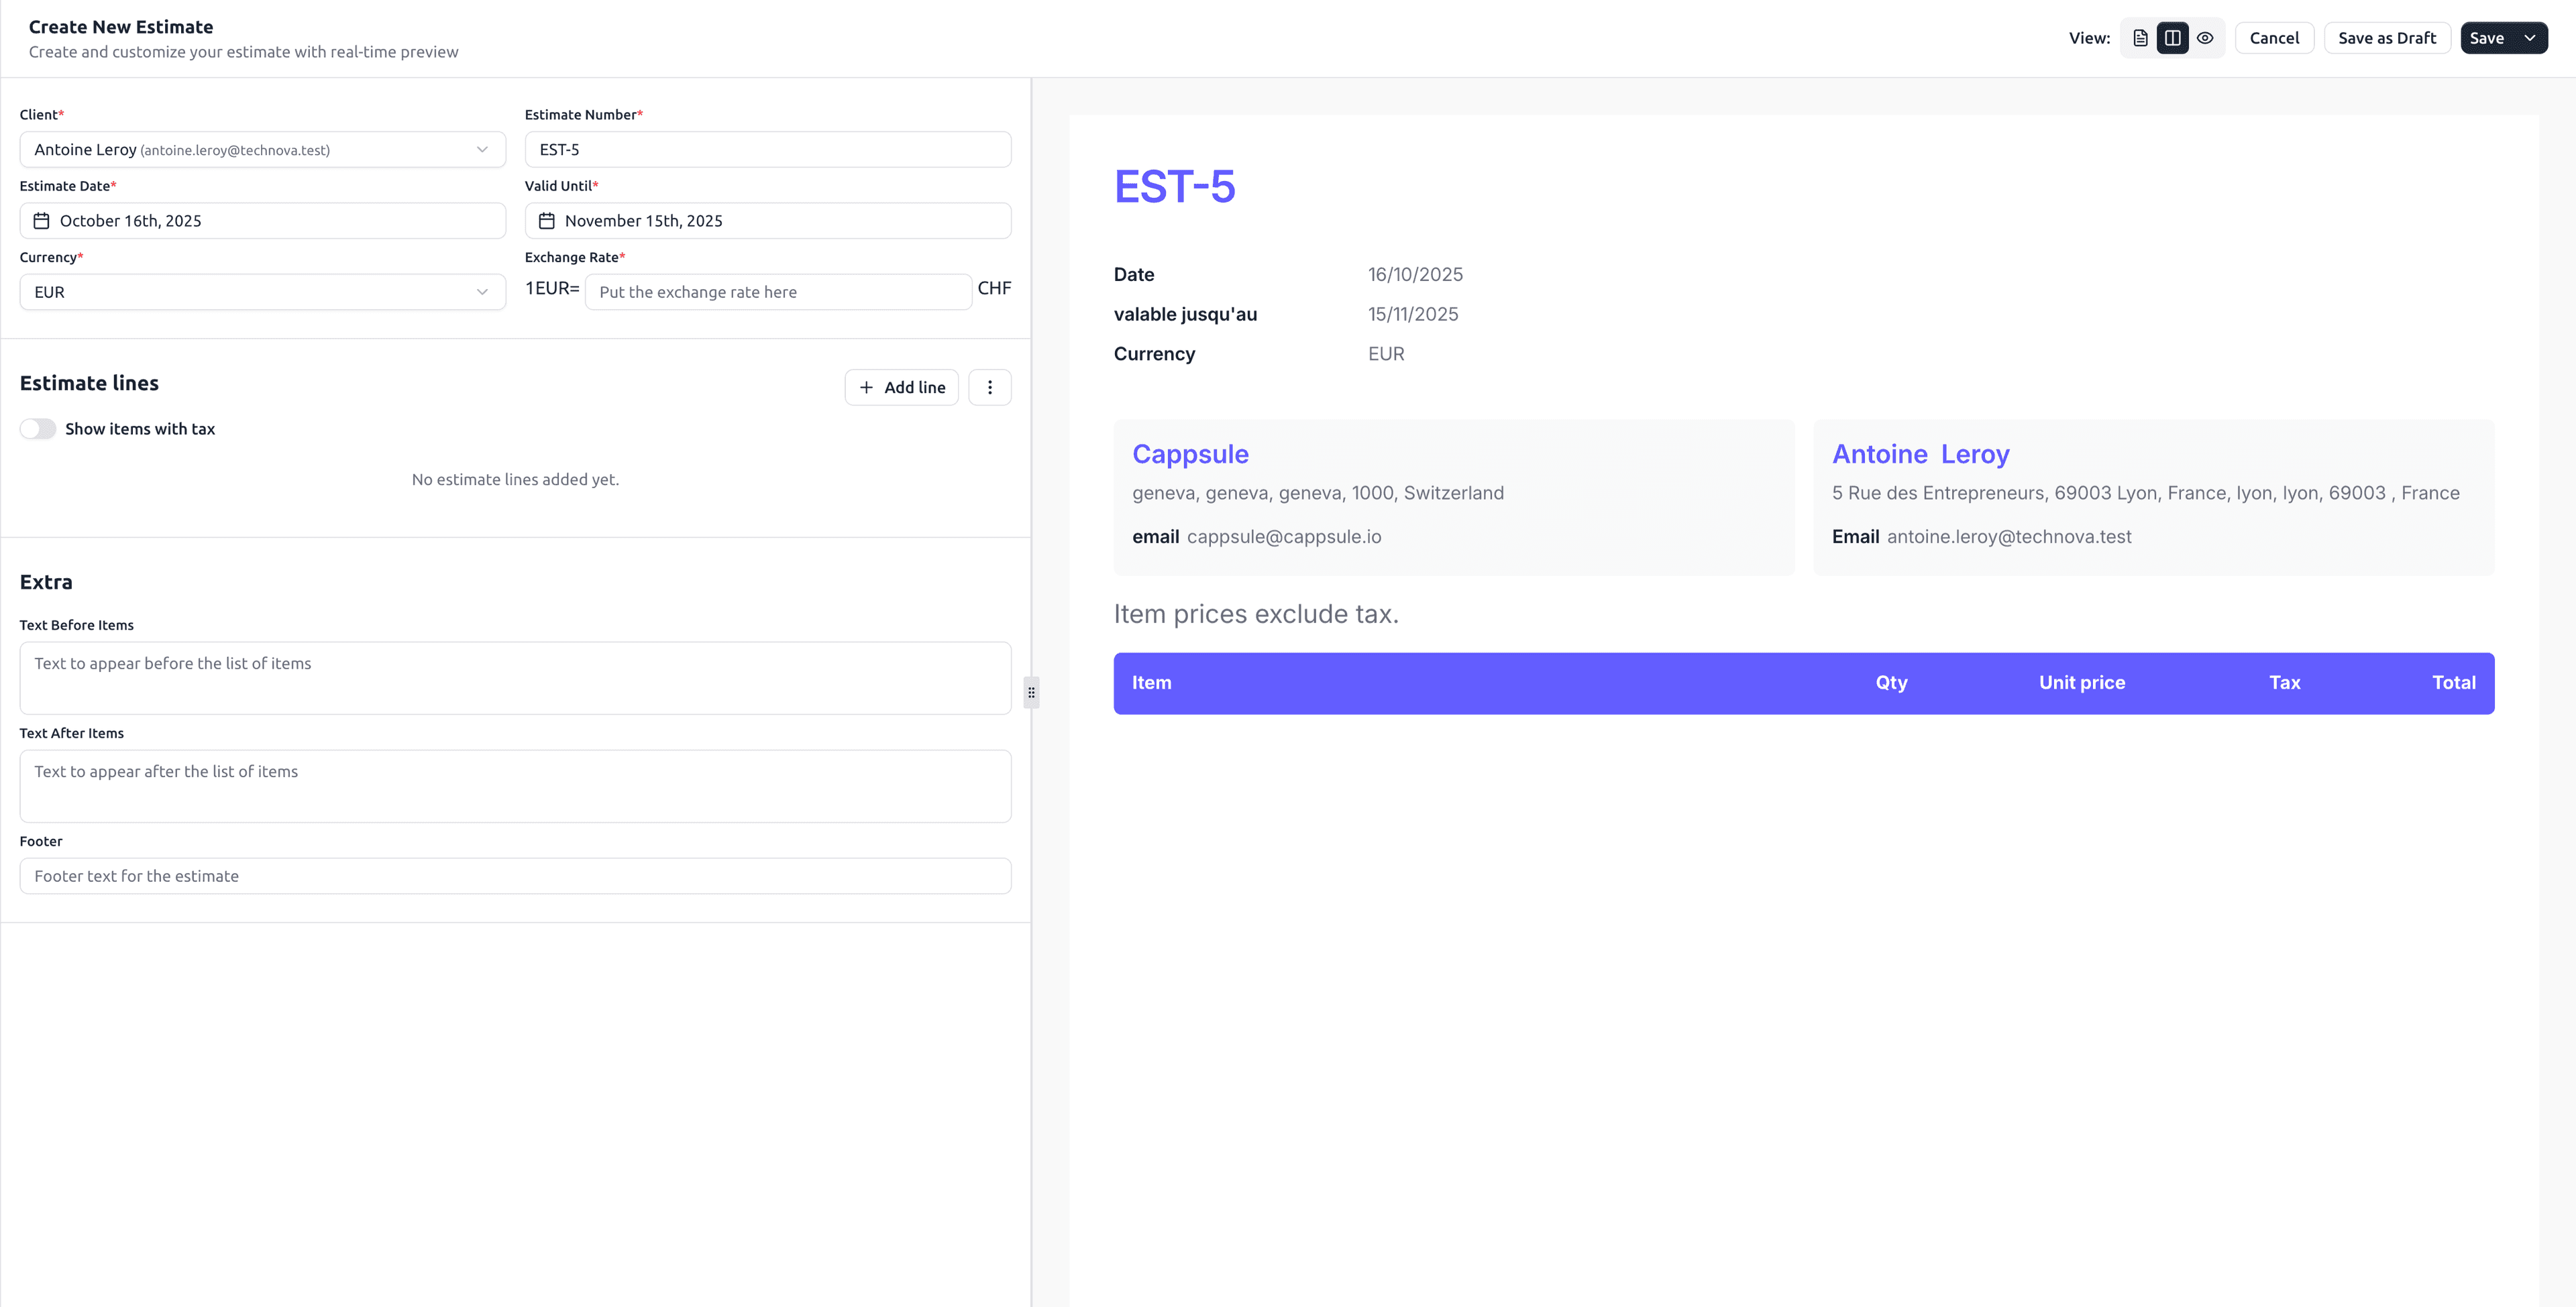
🧮 Step 3: Add Estimate Lines
Click Add Line to include one or more items or services.
Each line includes:
- Description of item/service
- Quantity
- Unit price
- Tax (optional)
Toggle “Show items with tax” if you need to include taxes per line.
Show items with tax: Determines whether item prices are entered and displayed as gross (with tax) or net (without tax). Totals are shown accordingly, and slight differences may appear due to rounding when conv
📝 Step 4: Customize Additional Sections
Use the Extra section to personalize your estimate.
| Field | Description |
|---|---|
| Text Before Items | Message appearing above the list of items. |
| Text After Items | Notes or payment terms after the item table. |
| Footer | Footer with company or legal info. |
Example:
🧾 “This quotation is valid for 30 days.”
🏦 “All prices exclude VAT unless otherwise stated.”
💾 Step 5: Save or Send
When your estimate is complete, choose one of the available actions:
| Action | Description |
|---|---|
| Save as Draft | Keep editable without sending to the client. |
| Save (Not Sent) | Finalize the estimate but keep it as “Not Sent” status. |
| Send | Send the estimate via BillingNow’s email system. |
| Mark as Sent | Mark estimate as sent (for manual sending via your own email). |
| Download PDF | Download the estimate as PDF for manual distribution. |
| Create Invoice | Convert estimate to invoice (available only for sent estimates). |
| Edit | Modify the estimate details. |
| Delete Estimate | Permanently remove the estimate from your system. |
| Cancel | Exit without saving current changes. |
Always Save as Draft to preview your quote before sending. Once approved by your client, you can convert the estimate into an invoice with one click.
💌 Sending Estimates via Email
You can share estimates with your clients in two ways:
1️⃣ Send Directly from BillingNow
Use the “Send” button to deliver the estimate automatically from the system. BillingNow will send a professional email to the client, including:
- The estimate PDF as an attachment
- The estimate summary (number, total, and validity period)
- A short personalized message
Example of email preview:
Subject: Estimate EST-3
Body:
Dear Mr Antoine Leroy,

Please find attached your estimate EST-3.

Thank you for your business.

Best regards,
Cappsule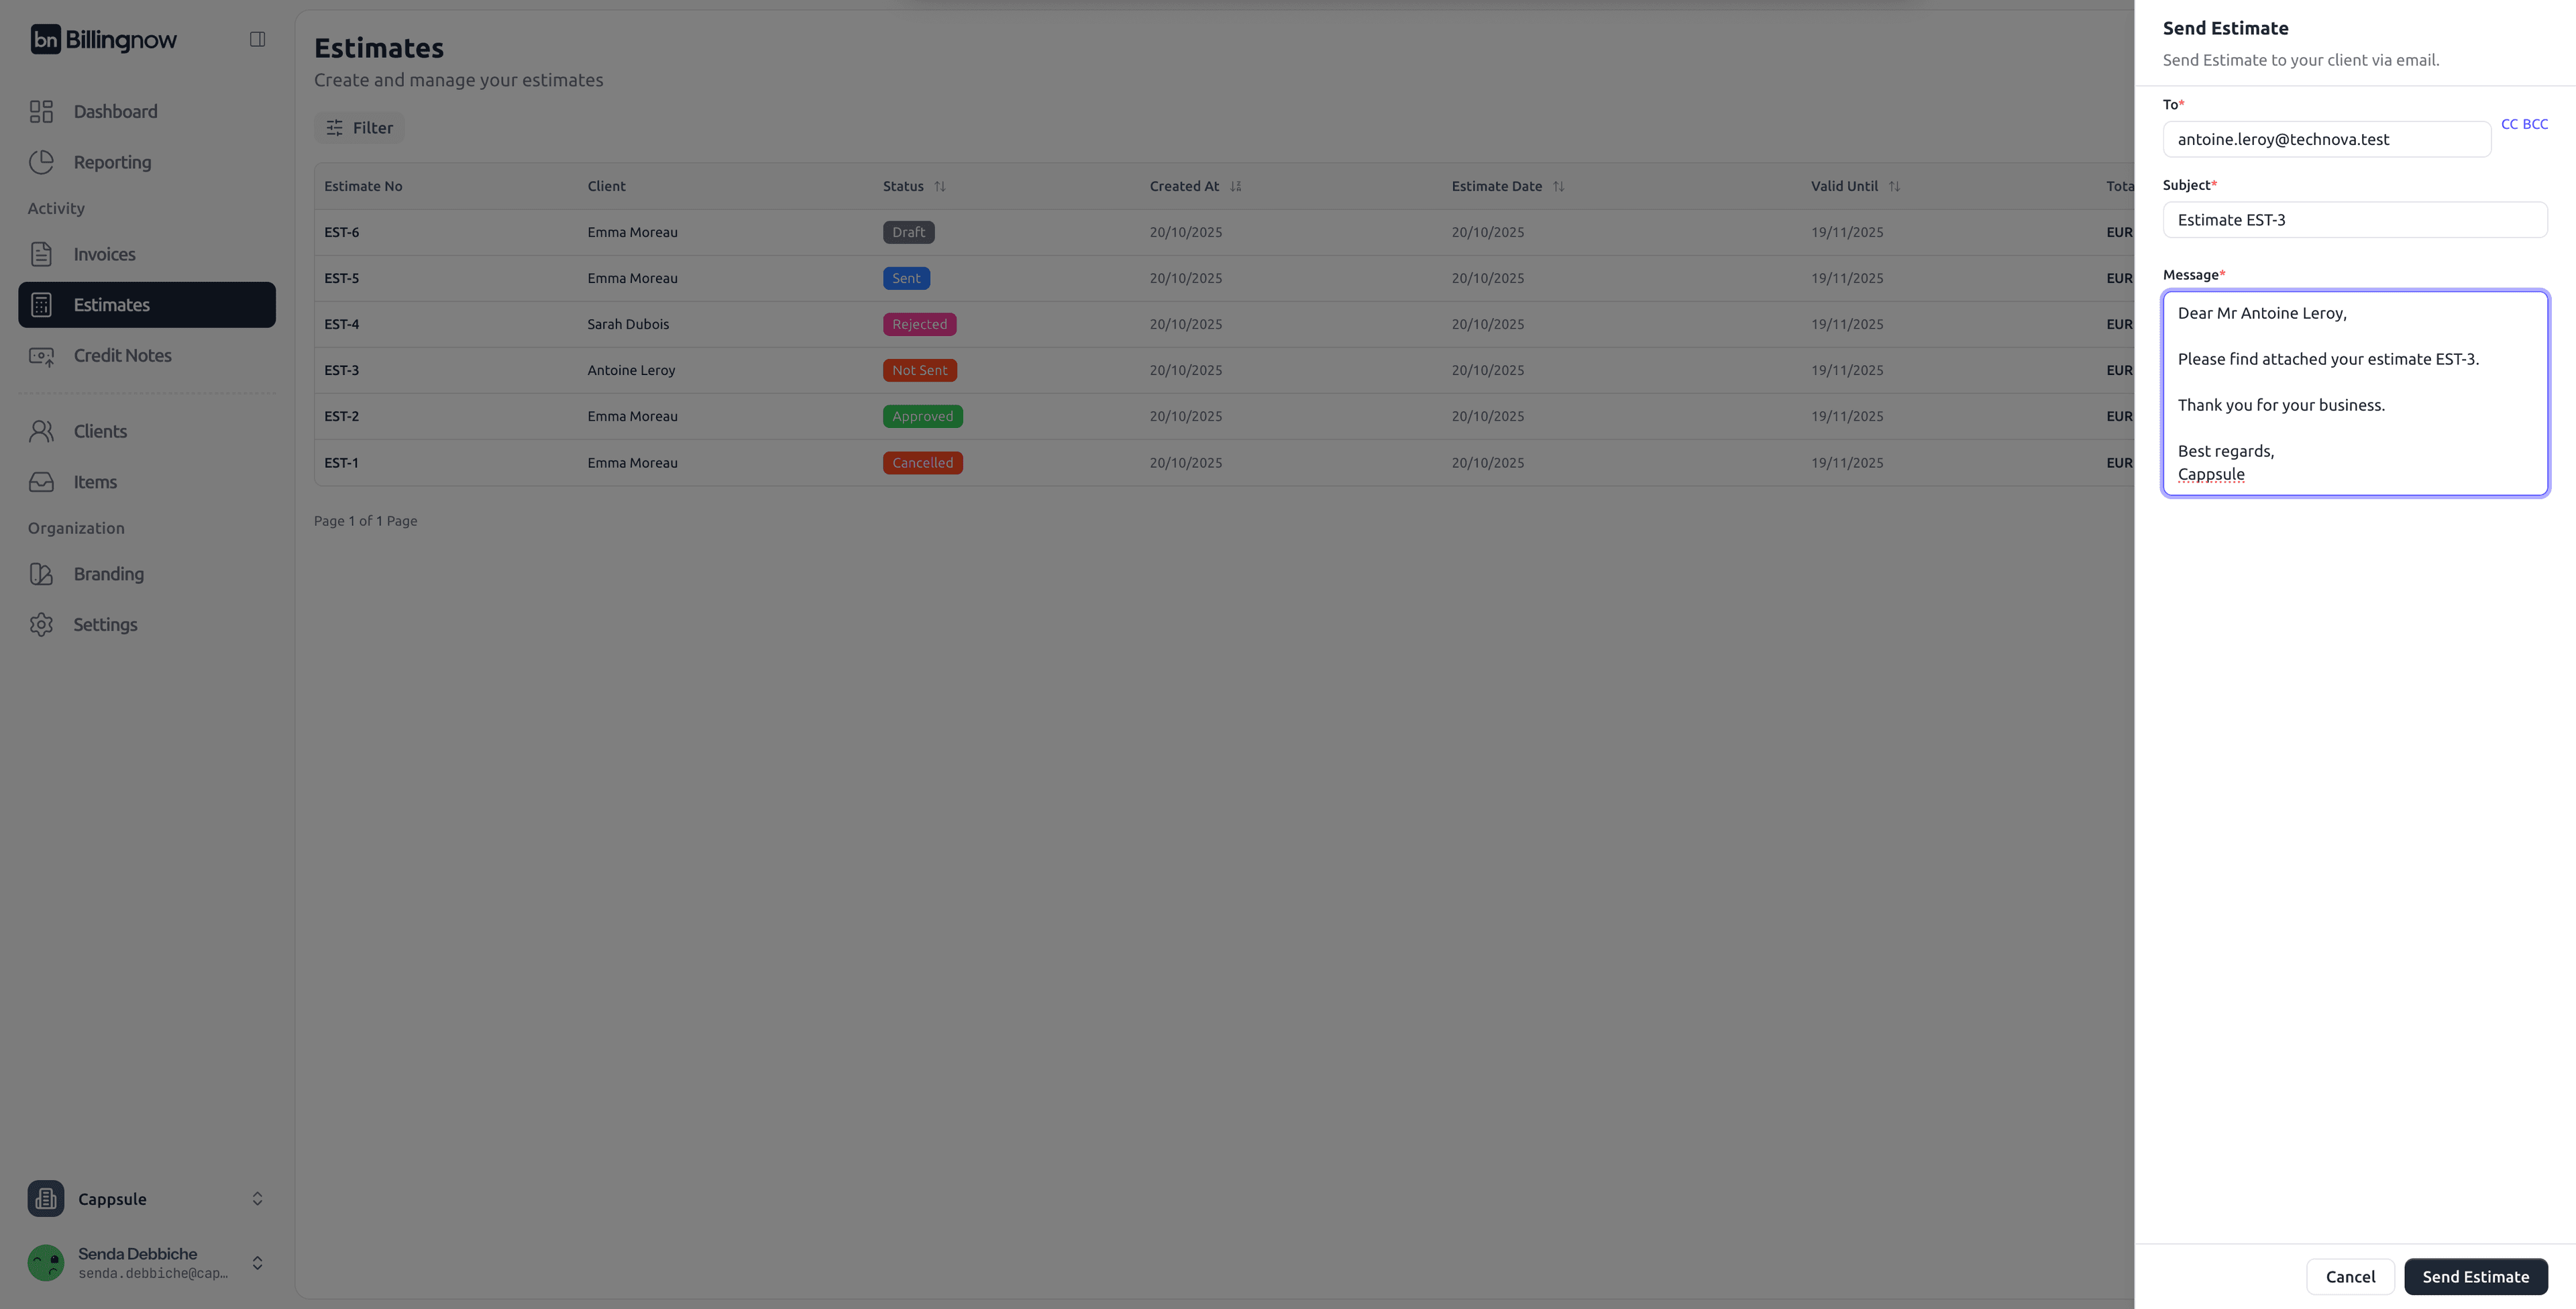
Options:
- You can customize the subject and message body before sending.
- Once sent, the estimate status changes to Sent, and a timestamp is recorded in the dashboard.
- The client’s email address is automatically taken from their profile.
Make sure your client’s contact email is correct in the Client Details section to ensure successful delivery.
2️⃣ Send Manually from Your Personal Email
If you prefer to use your own mailbox (e.g., Outlook, Gmail):
- Click Download PDF on the estimate.
- Attach the downloaded file to your personal email.
- Write your own message and send it manually.
- After sending manually, return to the estimate and click Mark as Sent to update its status in BillingNow.
Email Sending Status
Once an email is sent from BillingNow:
- The status icon changes from 🟠 Not Sent to 🔵 Sent.
- The Sent Date column displays the exact timestamp.
- You can Resend the estimate anytime from the Actions menu.
🔁 Convert an Estimate to an Invoice
Once a client approves the estimate:
1️⃣ Go to Estimates → Actions → Create Invoice
2️⃣ The system automatically copies all details to a new invoice form.
3️⃣ Review and confirm before sending.
💼 This feature ensures consistency between your quotes and final invoices, avoiding manual re-entry.
💡 Best Practices
✔ Keep consistent numbering (e.g. EST-001, EST-002).
✔ Always specify a validity period for legal clarity.
✔ Include terms like delivery time or payment delay in the footer.
✔ Use drafts to review quotes before client submission.